Temperature Alert Using CloudWatch and Lambda

The Problem
The apartment I live in is more or less detached from the main house, and the hot and cold water pipes run from the basement, beneath the hallway, and then up along the side of the garage into the bathroom which is directly above the garage. In the winter, these pipes can freeze on a really cold night. They actually have frozen a couple times over the last few years, so I’m very, very lucky they haven’t burst yet. (Contrary to what you’re probably thinking, this is actually a very nice apartment in a newer house).
The Solution
To prevent this from happening, I’ve had to keep an eye on the weather forecast and shut the water off to my apartment for the few days that the temperature gets below 20-25 degrees Fahrenheit. I’m ok with this solution, except when I go to bed at night and forget to check the temperature (and consequently wake up with frozen pipes and hope they aren’t burst). To hopefully prevent this from ever happening, I came up with a simple solution to run an AWS Lambda function on a schedule which queries the OpenWeatherMap API for the next days low temperature. The Lambda function then sends me a text message notification via SNS if it is forecast to dip below 26 degrees. Here’s how I did it:
1. The CloudWatch Event
Configuring the scheduled event in CloudWatch is relatively straightforward. Within CloudWatch, navigate to “Events” > “Rules” and create a rule. You have the option to trigger the event based on an event pattern or on a schedule. I chose to schedule my event so that it runs at 7:00am and 7:00pm every day during the months of October-April, giving me enough notice to shut the water off before I leave for work in the morning or before I go to bed at night. So in this case, I used Cron.
AWS’s syntax has a couple of small but important differences compared to the standard Linux Cron format. First, there is a sixth (required) value at the end to specify the year(s) it should run. Additionally, if you specify an asterisk (*) for the day-of-month, then the day-of-week value must be a “?”, and vice-versa. So, my cron expression looks like this:
0 0,12 * 11,12,1,2,3,4 ? *Also note – the time (hour) is specified in GMT. I live in the 5:00 Eastern Time Zone (i.e. Boston area), so 7:00am EST translates to 0:00 GMT. Once you have the Cron expression down, you just select the target. In my case, this was the Lambda function I created earlier.
2. The SNS Topic
Creating an SNS topic and subscription is pretty simple – just create a topic and specify the email address(es) and/or phone number(s) you want the notification to go to in the subscription. For this project I chose a standard queue and added my mobile number as a subscriber.
When I first configured this, my phone wouldn’t receive the SMS message and I must have spent a couple of hours trying to figure out why. I also subscribed my email address and that worked fine, as well as my other phone number. I then started Googling “SNS failed message delivery over SMS” and I found countless forum threads on Reddit and the like stating that SNS SMS delivery is hit or miss. I ended up figuring out that Google Fi (my cell service carrier) provides an email-to-text feature which finally enabled me to receive the message to my phone as a text. So, if you have a Google Pixel on the Fi network and are not receiving SMS messages via SNS, please save yourself some time and try this. Finally, note that SNS can get expensive quick when sending SMS messages, and there is a $1.00 default monthly service quota (which is about 155 SMS messages).
3. The Lambda Function
Below is my Lambda function code. It’s pretty simple but in summary, the script makes a connection to the API, drills down into the output for the daily low temperature for the current day and the next day, and triggers my SNS topic if either temperature is below the threshold of 26 degrees F.
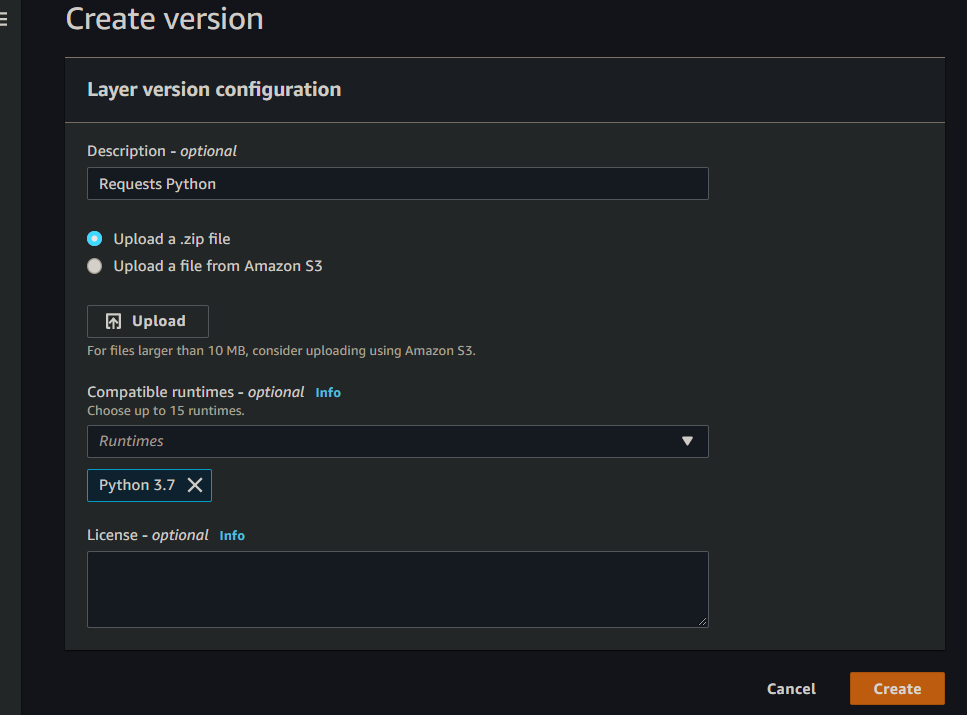
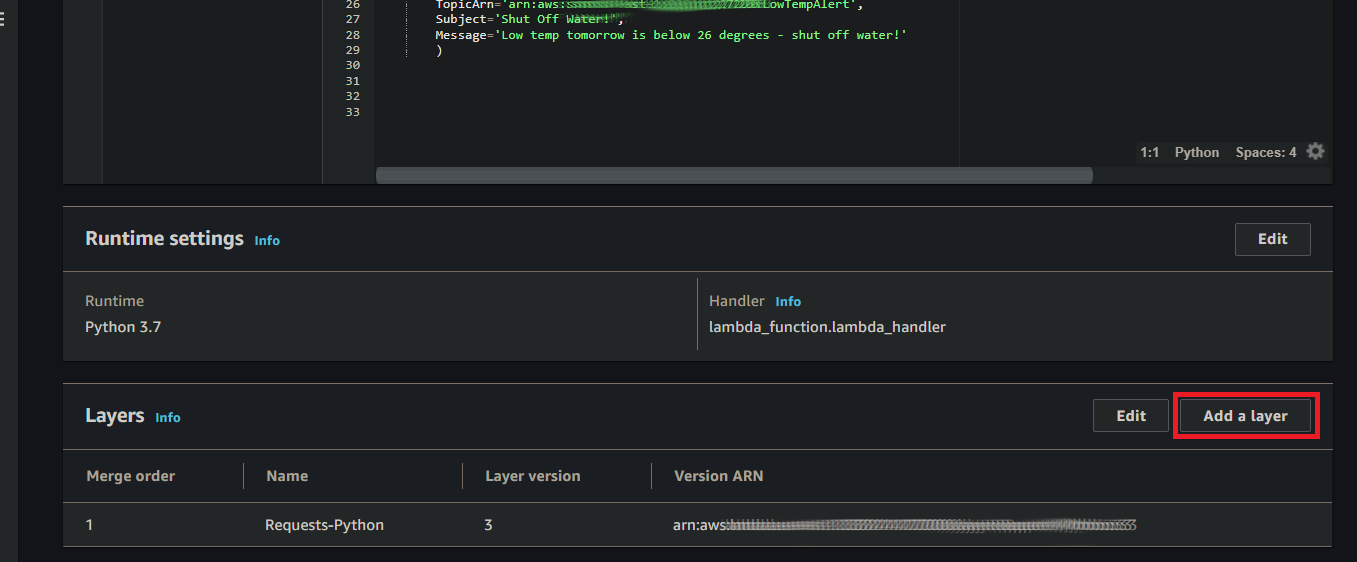
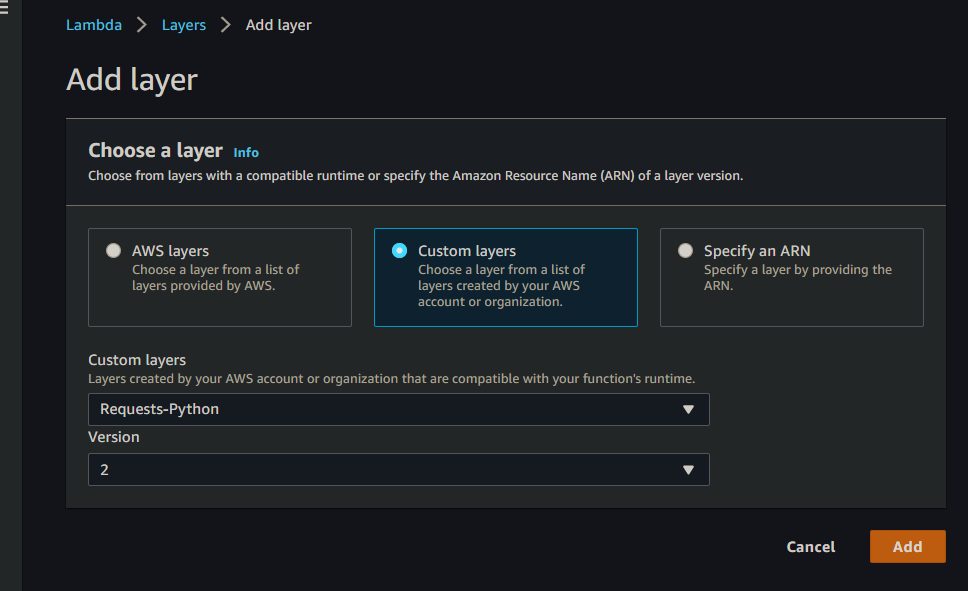
The only real issue I ran into when making this script was importing the “Requests” module. Initially, I received an error stating that the “Requests” module was not found. To correct this, I had to import the module to the Lambda session using the “Layers” functionality in Lambda. Creating the a layer is relatively straightforward, but you need to know the path to the Python libraries directory. In this case, for Python 3.7, the path is “python > lib > python3.7 > site-packages”. So to create the layer, I downloaded the Requests library from pypi.org and zipped it into a “requests_lib.zip” file containing the following directory structure: “python > lib > python3.7 > site-packages > requests” (where the “requests” directory contains the Python files from the previously downloaded “requests” package). Then you just upload it, finish creating the layer, and add the layer in your Lambda function. You should then be able to reference the Requests library (or whichever library you uploaded).
Overall this was a pretty simple project but useful nonetheless. I may modify this to check the hourly lows and include when the temperature will drop below the threshold, but it’s definitely doing its job as-is. We’ve had a few nights where the temperature dropped into the low 20’s since I got this working and it’s been reliably alerting me the morning and evening before. Now that spring is officially here, I shouldn’t have to worry about this for 9+ months – but when next winter rolls around I’ll be ready!