Working with the VMWare Workspace One API in PowerShell

If you’re reading this, you probably know what you’re looking to do with the API. Specifically, this post references the Workspace One UEM API which you can use to query information about devices in your Workspace One (cloud hosted) environment, as well as programmatically manage those devices. At the moment, I’m using this to create a PowerShell script that will automate tagging of devices based on whether or not the owner of the device is still in my employers Active Directory (i.e. has not been separated). Note that there is a similar API for Workspace One Intelligence that aids in generating reports. Just be aware the process for connecting to that API may be different than what I will outline here, which is specific to the UEM API. Finally, note that I used PowerShell 7.1 for the examples below.
The first thing you want to look at is the API Explorer. You can find it at https://[your_environment_subdomain].awmdm.com/api/help/. If you click the “APIs” tab at the top, it will present you links to the API’s for all the different systems (MDM, MCM, MAM, etc). Here, we’re working with “MDM (Mobile Device Management) REST API V1”. When you click that link and then click the “API Reference” tab at the top, you’ll see all of the available operations and their parameters. The cool thing about this is it’s an interactive reference – once you authenticate, you can run all the different operations on your environment via the web page and it will spit out the results as well as the “CURL” command you need to run it locally (or in a script).
Before you can do this however, you’ll need to log in as a Workspace One console Administrator within the API Explorer. To do this you need to perform two prerequisites:
- Create a console Administrator with API access in your Workspace One UEM management console
- Create a new Service Account with Admin privileges within system settings and confirm API access/authentication is enabled
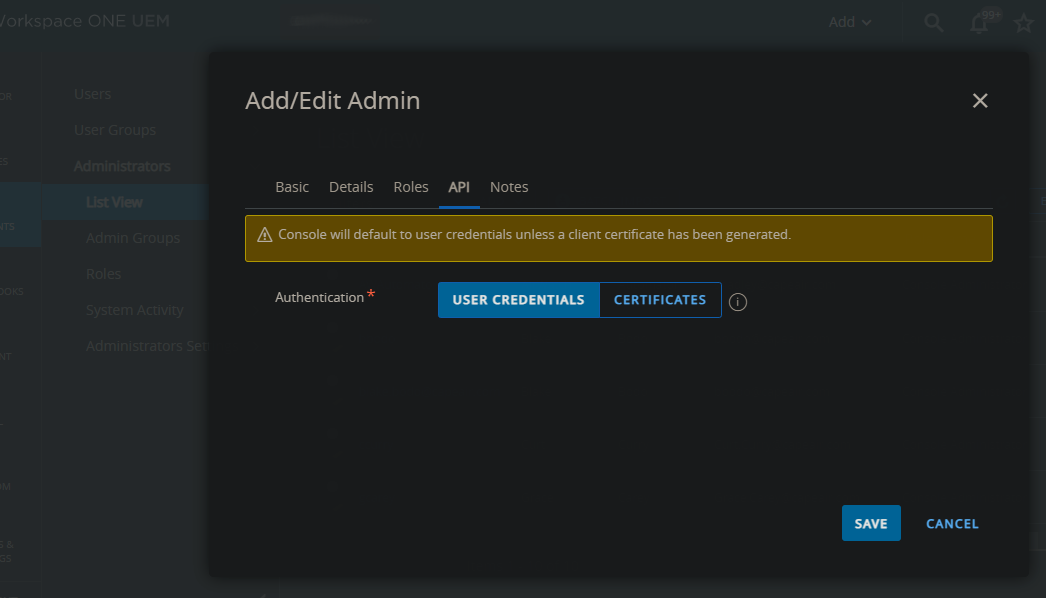
For the console Administrator account, navigate to Accounts > Administrators > List View, and click “Add”. Enter the Username, Password, etc to create the Administrator account.

Also confirm that “Authentication” is set to “User Credentials” under the “API” tab and click “Save”.
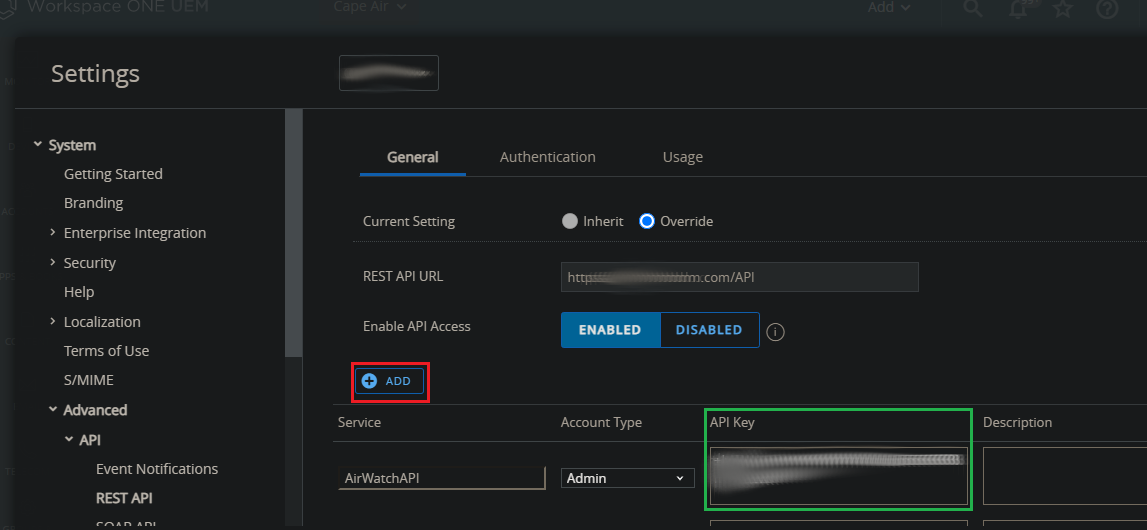
To create the API service account, navigate to General Settings > System Settings > Advanced > API > REST API, and click the “Add” button. Enter the service account name and confirm “Admin” is selected under “Account Type”. The API Key for this account will be listed next to the service account entry in the console (shown with the green box around it in the image below). This API Key is also known as your “aw-tenant-code”.
Now that we have our credentials, we can head back to the API Reference and authenticate. Again, you can navigate to this page at – https://[your_environment_subdomain].awmdm.com/api/help/.
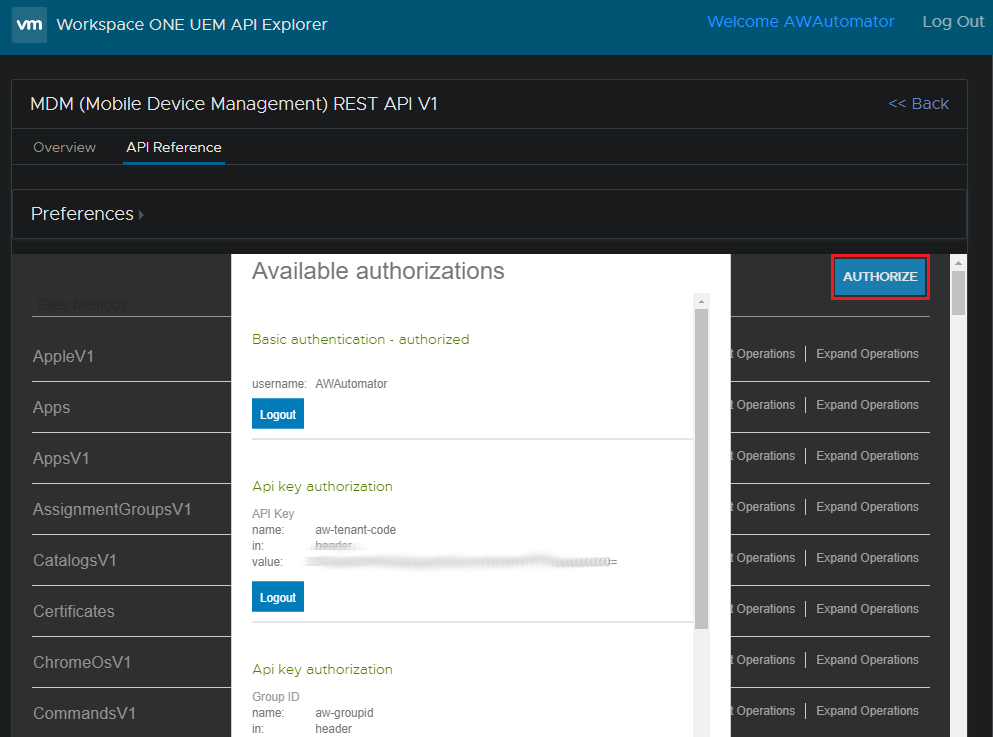
Within the API tab of the “MDM (Mobile Device Management) REST API V1” API page, click the “Authorize” button at the top. This will open an “Available Authorizations” lightbox. Under “Basic authentication”, enter the username and password of the console administrator account you created earlier and click “Login”. After the page reloads, click the “Authorize” button again and enter in the service account API key we just generated under “Api key authorization” and click “Login”.
At this point, you should be able to expand any of the API Operations listed, enter the required parameters, and receive an error-free JSON-formatted response when you click the “Try it!” button. If you use a Mac or Linux computer, you can copy and paste the auto-generated CURL command right into your terminal and receive the same response. However, if you’re like me and need or want to use PowerShell for your scripting, keep reading.
PowerShell doesn’t have a “CURL” GET command, but it does have an “Invoke-WebRequest” command which essentially does the same thing. For a simple GET request the syntax is similar – the only real difference is the way you specify the authentication headers.
To do this in PowerShell, you enter the header values in a hash table. A hash table is basically just an array which stores key-value pairs. So in this case, you specify the user authorization header string and aw-tenant-code. Note that for an actual script that you’d have running as a scheduled task, you’d probably want to pull in a secure string from a credential store somewhere. For simplicity and brevity however, the code below simply prompts the user to enter the user authorization string (shown in the API Explorer-generated CURL command) and aw-tenant-code API Key.
$awTenantCode = Read-Host -Prompt "Enter AirWatch API Key"
$auth = Read-Host -Prompt "Enter AirWatch Authorization Header String"

$Headers = @{
    "Accept" = "application/json"
    "Authorization" = "Basic $auth"
    "aw-tenant-code" = $awTenantCode
}
With your authentication headers loaded in, you can simply call the REST URL with the Invoke-WebRequest PowerShell command. The following API call returns a JSON-formatted list of all devices in your AirWatch environment:
Invoke-WebRequest -Uri "https://[your_environment_subdomain].awmdm.com/API/mdm/devices/search" -ContentType "application/json" -Headers $HeadersOnce you have the data you’re looking for, you can load it into a variable and manipulate it as necessary. If you want to POST, you can load your POST values into a hash table like we did for the Authentication values and use the “-method POST” option with the Invoke-RestMethod command.
$postParameters = @{
    "BulkValues" = @{
        "Value" = @(1543341)
    }
} | ConvertTo-Json

Invoke-RestMethod -Uri "https://[your_environment_subdomain].awmdm.com/API/mdm/tags/20687/adddevices" -ContentType "application/json" -Headers $Headers -Body $postParameters -Method POST
Notice that we use the “-Body” flag and pass the $postParameters variable with the arguments. For this POST call, I found the JSON format needed for the $postParameters variable from the API Reference under the “POST /tags/{tagid}/adddevices” API call (shown below).
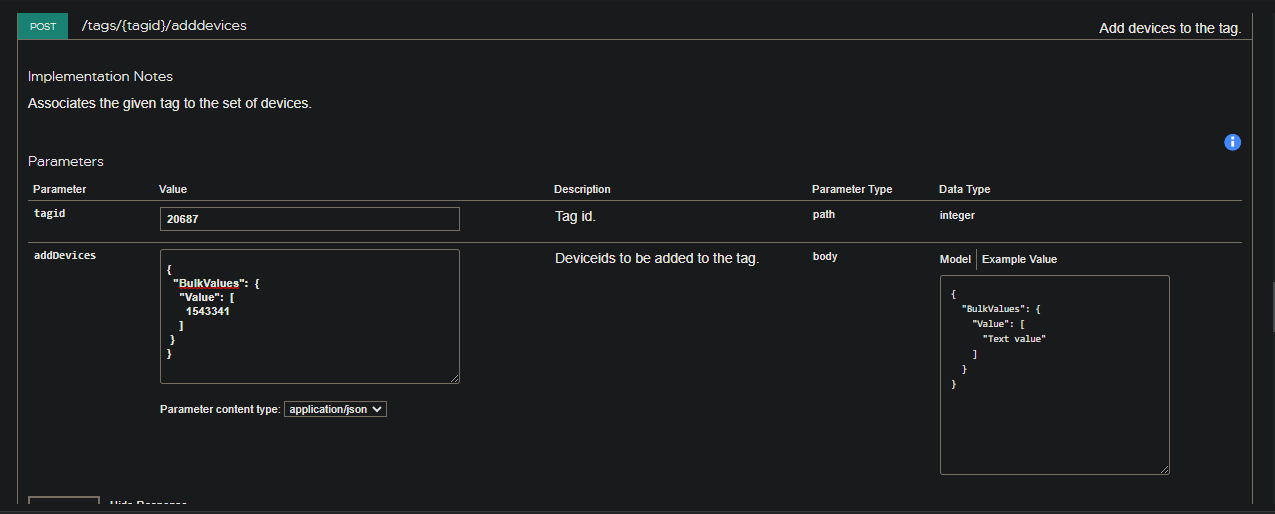
At first I tried entering the JSON exactly as outputted in the API Reference for the $postParameters variable, but the Invoke-RestMethod command wouldn’t accept it. You have to format the JSON as shown above with “@{” in place of open curly brackets, “@(” instead of open square brackets, “equals” signs instead of colons, and finally pass it to the “ConvertTo-JSON” PowerShell function. So, the JSON below…
{
  "BulkValues":  {
    "Value":  [
      1543341
    ]
 }
}
Translates to this in PowerShell…
@{
    "BulkValues" = @{
        "Value" = @(1543341)
    }
}
This should be enough to get you started with doing API calls and managing VMWare WorkSpace One via the API. Hopefully you found this helpful in some way – I’ll try to update this post with my entire tag-updating function once it’s complete. Happy scripting!